Wondering who is on your WiFi right now? You might be surprised. Here’s how to find out exactly which devices are connected to your network — and what to do if you spot a stranger.
Picture this: your Netflix keeps buffering. Your video calls drop at the worst possible moment. Your internet feels sluggish even though you’re paying for high-speed broadband.
You restart the router. Nothing changes. You call your ISP. They say everything looks fine on their end.
What if the problem isn’t your connection — but someone stealing it? It happens more than you’d think, and most people never think to check who is on their WiFi.
Wi-Fi piggybacking is more common than most people realize. A neighbor who figured out your password, a house guest who never forgot it, or in rarer cases, someone with more malicious intent — they can all end up on your network without you ever knowing. And slow internet is the least of your worries. An unauthorized person on your WiFi can potentially monitor your browsing, intercept unencrypted data, and use your connection for activities you wouldn’t want traced back to your IP address.
The good news? You don’t need to be a network engineer to check. This guide walks you through exactly how to see who is on your WiFi — step by step, in plain English.
How Does Someone End Up on Your WiFi Without Permission?
Before we get into the detection part, it helps to understand how this happens in the first place. Most people assume their home network is safely locked away behind a password. And technically, it is. But passwords have a way of spreading.
Think about everyone you’ve ever shared your Wi-Fi password with — friends, family, contractors, the occasional plumber. Many modern phones automatically share Wi-Fi credentials with contacts or sync them across devices. Some older routers still use default passwords that are trivially easy to guess (yes, “admin” and “12345678” are still disturbingly common).
There’s also the WPS vulnerability. WPS (Wi-Fi Protected Setup) is that little button on your router that lets you connect a device without typing a password. Convenient, yes — but it has a well-known security flaw that makes it relatively easy to brute-force on older routers.
Worth knowing: You don’t need to be “hacked” in a dramatic sense for someone to be on your network. Most cases are mundane: a forgotten password, an ex who never changed their credentials, or a neighbor who asked once and never lost access.
Signs That Someone Unauthorized Is on Your WiFi
Your router doesn’t send you alerts when a stranger connects. But there are some clues worth paying attention to:
- Your internet is consistently slow — especially during evenings or weekends when neighbors are home.
- Your router’s lights are blinking like crazy at times when nobody in your house is using the internet (late at night, for example).
- You’re hitting data caps you never used to hit, despite your habits not changing.
- Your streaming quality has noticeably degraded without any change from your ISP.
- Devices you don’t recognize show up in your router’s connected devices list.
None of these alone is a smoking gun. But if two or three apply to you, it’s worth taking a closer look.
How to Check Who Is on Your WiFi (Step by Step)
There are two main ways to do this: through your router’s admin panel, or using a free tool called Advanced IP Scanner. Both work well — the tool is easier to read for most people.
Method 1: Check Who Is on Your WiFi via the Router Admin Panel
Every router has a built-in web interface that shows you which devices are currently connected. Here’s how to access it:
- Find your router’s IP address. On Windows, open Command Prompt and type
ipconfig. Look for “Default Gateway” — that’s your router’s address, usually something like192.168.1.1or192.168.0.1. On Mac, go to System Settings → Network → your Wi-Fi connection → Details. - Type that address into your browser. Just paste it into the address bar like a website URL and hit Enter. You’ll see a login page.
- Log in. If you’ve never changed your router’s admin password, it’s probably printed on a sticker on the bottom of your router. Common defaults are
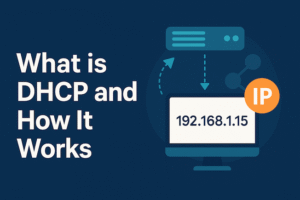
admin / adminoradmin / password. (And yes, you should change this after — we’ll get to that.) - Look for “Connected Devices,” “DHCP Clients,” or “Device List.” The exact name varies by router brand, but every router has this section. You’ll see a list of devices with their names, IP addresses, and MAC addresses.
- Go through the list. Try to match each entry to a device you own — your phone, laptop, smart TV, tablet, smart speakers, etc. If you see something you can’t identify, that’s worth investigating.
Tip: Device names can be cryptic — things like “android-a3f920b” or “ESP_3C2F88” aren’t exactly obvious. Try turning off your devices one by one and refreshing the list to see which entries disappear. What’s left is what you don’t own.
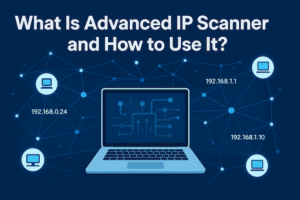
Method 2: Use Advanced IP Scanner to See Who Is on Your WiFi
If your router’s interface is confusing or the device names are unclear, Advanced IP Scanner is a great free alternative. It scans your local network and gives you a clean, readable list of every connected device — including manufacturer info that can help you identify them.
- Download Advanced IP Scanner from advanced-ip-scanner.com. It’s free and doesn’t require installation if you choose the portable version.
- Open the program and click “Scan.” It will automatically detect your network range and scan all IP addresses within it.
- Review the results. You’ll see each device’s name, IP address, MAC address, and often the manufacturer. “Apple, Inc.” is probably your iPhone. “Samsung Electronics” is likely your TV. “Espressif” might be a smart plug or IoT device.
- Flag anything unfamiliar. If you see a device from a manufacturer you don’t recognize, or simply more devices than you can account for, that’s your signal to act.
We covered Advanced IP Scanner in detail in a separate guide if you want a deeper walkthrough of the tool.
What to Do When You Find an Unknown Device on Your WiFi
Don’t panic. And don’t just unplug the router — that only disconnects them temporarily. Here’s what actually works to remove unwanted users from your WiFi and keep them out:
Step 1: Change Your Wi-Fi Password Immediately
This is the single most effective thing you can do. Go back into your router’s admin panel, find the Wi-Fi settings, and set a new password. Make it at least 12 characters — a mix of letters, numbers, and symbols. Everyone who was connected (including you) will need to re-enter the new password, which effectively kicks out anyone who shouldn’t be there.
Step 2: Block the Device by MAC Address
Most routers let you block specific devices using their MAC address — a unique identifier that doesn’t change. In your router’s admin panel, look for “MAC Filtering” or “Access Control.” Add the unauthorized device’s MAC address to the block list. This prevents that specific device from reconnecting even if they somehow get your new password.
Step 3: Disable WPS
While you’re in the router settings, turn off WPS if it’s enabled. It’s in the “Advanced” or “Wireless” section of most routers. You rarely need it, and it’s a known security weakness.
Step 4: Update Your Router’s Firmware
Routers receive security updates just like your phone and laptop. Most people never apply them. In your router’s admin panel, look for a “Firmware Update” or “Software Update” option. If there’s an update available, install it.
Step 5: Change Your Router’s Admin Password
If you’re still using the default admin login (the one printed on the router), change it now. Anyone on your network can access the admin panel if they know the default credentials — and those defaults are publicly listed for most router models.
How to Stop Unauthorized Users From Getting on Your WiFi
Prevention is always easier than damage control. Here are the habits that actually make a difference:
| What to Do | Why It Matters | Difficulty |
|---|---|---|
| Use WPA3 or WPA2 encryption | Older encryption (WEP, WPA) can be cracked in minutes | Easy |
| Set a strong, unique Wi-Fi password | Weak passwords are guessed by brute-force tools quickly | Easy |
| Create a separate Guest network | Visitors get internet access without touching your main network | Easy |
| Disable WPS | Known security flaw with no real benefit for most users | Easy |
| Keep router firmware updated | Patches security vulnerabilities before they can be exploited | Medium |
| Check connected devices monthly | Catches unauthorized access early | Easy |
Guest Network Tip: If you frequently have visitors or smart home devices (thermostats, cameras, light bulbs), put them all on a separate Guest network. This limits what they can “see” on your network, and you can change that password freely without disrupting your own devices.
What About More Serious Threats? (The Honest Answer)
Most WiFi intrusions are low-level — a neighbor freeloading on your connection, not a sophisticated attacker. But it’s worth knowing what a more serious threat looks like, so you can recognize it.
A man-in-the-middle attack, for example, is when someone on your network positions themselves between you and your router to intercept your traffic. This is technically possible on a local network, but it’s also detectable with the right tools and largely mitigated if you stick to HTTPS websites (the padlock in your browser’s address bar).
If you’re dealing with a legitimate security threat — suspicious activity, evidence of data theft, or concerns about stalkerware — the right move is to factory reset your router (this wipes all settings and removes any unauthorized configurations), set everything up fresh with strong credentials, and consider reaching out to a cybersecurity professional.
For the vast majority of people reading this, though? The simple steps above will handle everything you’re likely to encounter.
Final Thoughts
You don’t need to be paranoid about your home network. But you do need to be aware. Checking who is on your WiFi takes about five minutes once a month — and that’s enough to catch most problems before they become actual issues.
And now you know exactly how to do it.
If you found this useful, check out our guide on Advanced IP Scanner — the free tool we used in Method 2 above — for a deeper look at what it can do.